Where memories are made
One of the joys of online games, and in particular sandbox games, is that you get to spend time with a distributed set of friends/family, building a shared experience over many hours, days, and months. You end up creating things that, whilst they have no physical presence, have some meaning to you and your friends: loot that you’ve gained from dungeons in a raid you all spent hours on, the castle that you all constructed over many weeks, the suit of armour you built up over months getting to the top level of the game you’re in.
The problem with them all though is they’re virtual, and in that the same way it’s nice to occasionally take some of those digital pictures you snap and turn them into a physical rendering you hang on the wall, wouldn’t it also be nice to take those virtual mementos of all the hours you spent having a good time with your friends and render them into something physical you can treasure?
The first example of this that I remember seeing was at Playful a few years back, where Alice Taylor talked about getting her World of Warcraft avatar printed as a statue back in the late 00s, something that was a big thing back then (and how it inspired her to set up Makie Lab). That was then though, and you’d think that with 3D printers being post-fad, that we’d all be able to turn our memorable virtual online experiences and make them into something we can place on the mantle piece.
But sadly it’s not the case. I suspect mostly that’s because 3D design and production, despite within reach of much more people, is actually quite hard. If I wanted, for instance, to render my custom Spartan armour that I built up over many hours in Halo: Reach, well, tough. I don’t have access to the models from the game itself (all that data being proprietary and copyrighted to the nines), and I don’t have the learning and/or talent to recreate it myself.
Thankfully though, there are some more open games where this is possible. For example, Minetoys will let you type in your Minecraft avatar name (or that of a friend) and have them 3D printed and sent to you. Now, most Minecraft avatars aren’t much to look at admittedly, but they almost certainly mean something to the player themselves – this is the in game identity they have chosen for themselves for the many hours they’ve played this game. A couple of years ago I used this to make Minecraft versions of my and Laura as a valentines day gift.
But that’s just our avatars – what about the actual things we spend many hours constructing in Minecraft? This gets a little more nerdy, but can be done. Recently I had a little time to spare, so I thought I’d attempt to take a building I created on one of our Minecraft servers and get it 3D printed. I thought I’d share with you the process I went through, as it wasn’t straight forward, but it wasn’t too hard, and hopefully by explaining this it’ll encourage some others to give this a try.
Now, I didn’t make this easy on myself: I chose to experiment with a tower I built on our currently Minecraft server, which is full of non-standard modifications (it’s running the Direwolf20 mod pack from Feed the Beast), and I wanted to produce not just a 3D print out, but a high quality colour one. If you’re going to do these things, you might as well jump in at the deep end.
Let’s start with the tower:
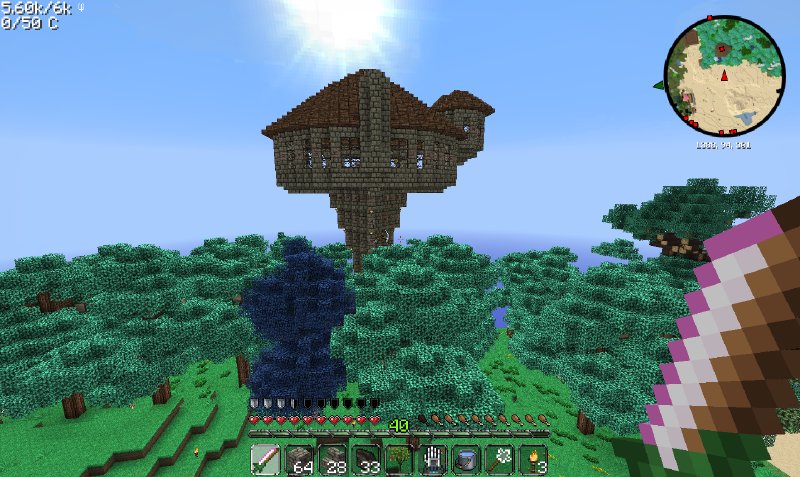
This is my wizard’s tower, where I’ve been playing with various magical mods on and off for last six months. The first thing to note is it’s in a forest (a magical forest!), and as such you can’t see a lot of the tower, and I don’t have the budget to print out the entire forest (quality 3D printing gets expensive quickly, so you want to make your grams count), so my first task was to get the tower on its own, outside of forest.
To do this I used MCEdit, a Java program that lets you modify minecraft maps. MCEdit is both wonderful and hateful – it’s actually quite easy to understand (after watching a few YouTube videos of people explaining it), but it’s written in Java which leads to a non-native UI, and on OS X you can’t even resize the window. Still, despite the mild annoyances, I was able to load up the server map, find my tower, start to work with it.
To make things easier to work with, I first cut the area around my tower out, and placed it in an empty flat map. Although MCEdit copes quite will with large worlds, it’s a bit easier to whiz around when there’s less map to load and less other landscape to obscurer your view. Having done that, I then set about deleting all the trees and things around my tower that I didn’t want printed. This took a little while, and indeed was probably the slowest part of the process, but in the end I was left with something mostly clear:
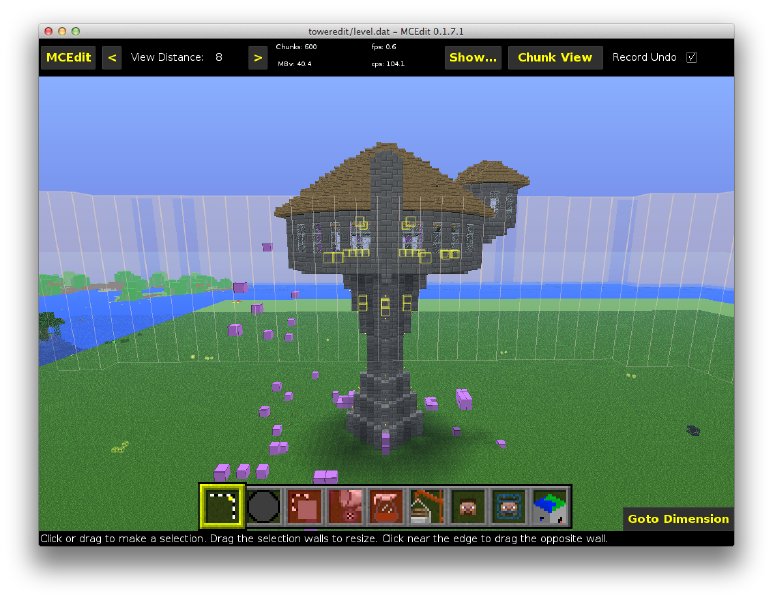
One thing to note here is the purple and yellow blocks: these are non standard blocks added by the mod pack we’re using. The tool I used to turn the map into a 3D model doesn’t know what they are, thus they all need to be removed, otherwise they’ll get turned into bedrock, and I’ll have weird dark grey blocks in my print out where I don’t want them. Having removed the trees, I then removed or replaced any non-standard blocks. At this point I now have a Minecraft map with just the thing I want to print in it, so now we need to turn this into a 3D model that can be printed.
To do this we use another tool called Mineways, which is even more archaic in UX terms than MCEdit (it uses X11!), but gets the job done. Mineways will let you define a 3D cubic space from the map, and will then turn that into a 3D model suitable for sending to Shapeways, a 3D printing by mail company (it will do more, but this is what it defaults to, which is quite handy).
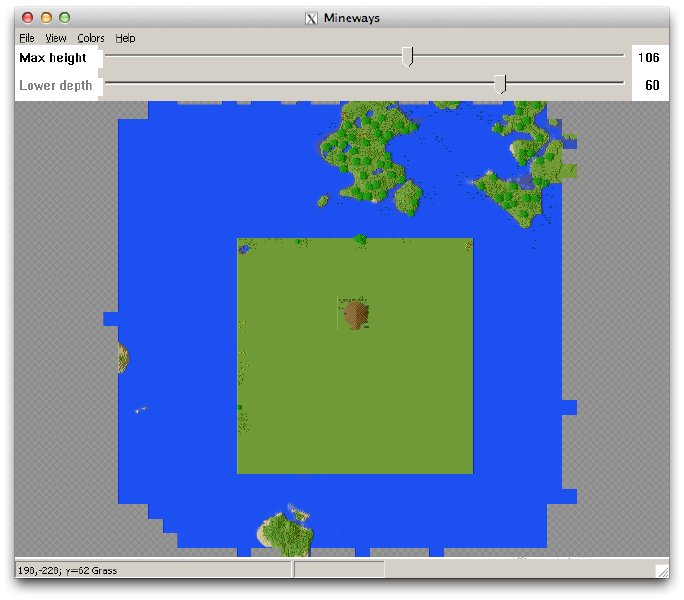
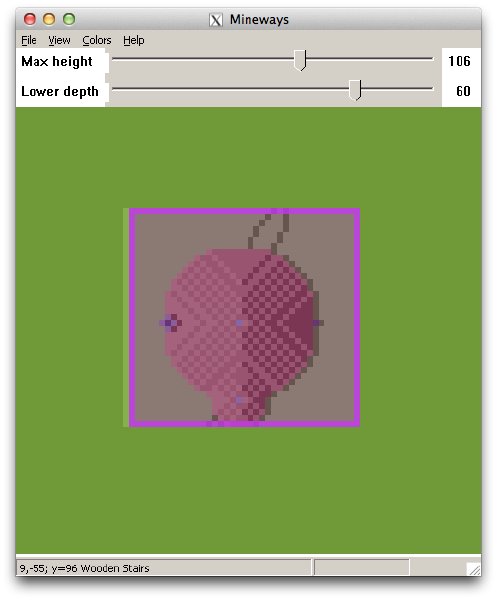
The first step is to define the volume you want to be printed, as you don’t want to print the entirety of you map. You do this by using two sliders to define the top and bottom height levels, and then you drag a rectangular region for the vertical edges of your volume. For the bottom I was careful to select a few layers below the start of my tower, so as to give me a base on which to stand my model. You can see my tower nicely defined here, though it takes some imagination to imagine the resultant 3D model:
After you have selected the volume you want, you can then try exporting it. Here there’s a large number of parameters you can play with, and I must confess, for my first time I just left most of them at the default. The thing you want to check for are the options to automatically hollow out your model, which will save you significantly when it comes to the cost of the printout. Mineways will give you a estimate to how much Shapeways will charge for your model, which I found to be quite handy at this stage. One issue I did hit on OS X was that it couldn’t find the custom texture file it wanted to use for the colours for the output model. The file was in the Mineways folder, but you needed to select it manually each time, so don’t worry if this happens.
Once you’ve exported from Mineways, all the difficult bits are done. Now you just take the exported .wrl file you’ve generated and upload it to Shapeways. Shapeways, as I’ve already mentioned, is a service where you can send 3D designs and have the fabricated design sent back to you. There’s a wide selection of materials you can choose from, depending on your budget and tastes; thankfully the colour sandstone I was printing in is quite cheap, but if I had six grand to spare I could have got my tower printed in sterling silver…
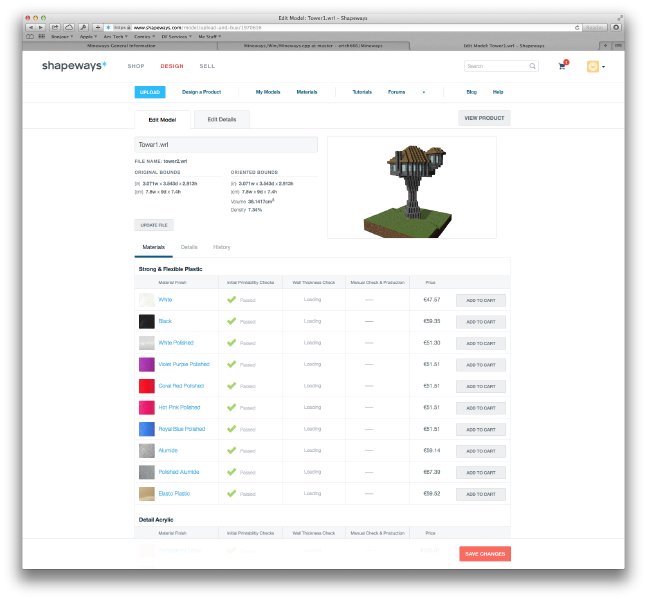
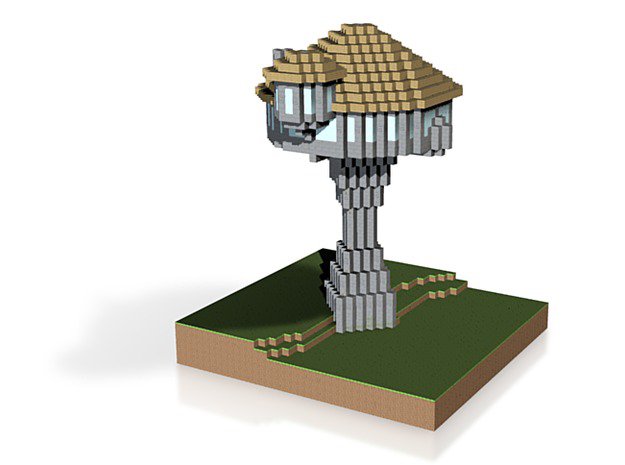
Once uploaded you get a nice preview of what you’re going to get, which is handy, given Mineways doesn’t do this for you:
It took me a couple of goes to get the correct model I wanted based on selecting the right volume. Once I was happy, I clicked print, and then thirty euros and a week or so later, up turned this in the post:
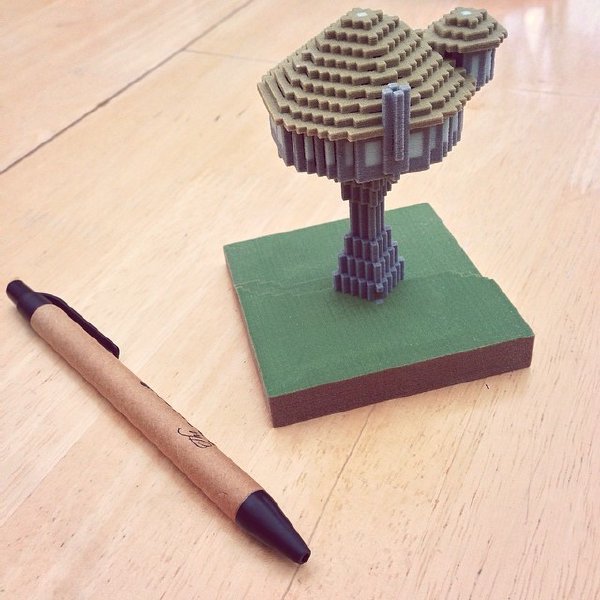
Not a bad likeness?
I’m quite pleased with the result, but there’s a couple of things I’ll do differently when I next do this. Firstly, I’ll do a test print on a lower quality (i.e., cheaper) 3D printer to test the model I’ve made is actually going to come out how I expect it. At 30 euros a pop, had things gone wrong it’d have got quite expensive to keep tweaking it until I was happy. Thankfully I have access to such a printer in the form of a MakerBot at Cambridge Makespace. Although the quality of output from the MakerBot is nothing like what I’d get from Shapeways (and it’ll only do single colour), it’ll be enough to do a preview print and make sure the proportions etc. are what I want. In this instance I didn’t have time to do it, but I’ll definitely do this stage in future. Getting the data from Mineways into a format Makerbot understands is more tricky, but someone has documented it already, and I’ve had a little play and can confirm it works.
The second thing I’d do (and had I previewed my first model I’d have spotted this) is go around the internals and “fill” any seams where diagonal blocks have just one touching edge rather than a touching face. If you look closely at my picture of the printed tower, you can see some black lines on the roof and near the windows where the edges didn’t form up correctly and it exposes the hollow inside. Had I gone around the internal of my model in Minecraft or MCEdit and doubled the thickness on all such seams, so all outside cubes joined with a face rather than an edge, I could have avoided that. In Minecraft this works fine, but in Minecraft you don’t suffer shrinkage :)
- Next: Past future
- Previous: In its right place
- Tags: 3D-printing, Gaming, Geek, Minecraft